
Printing · Updated September 2026
Resize a photo for printing — inches, centimetres, 300 DPI
Type the printed size in inches or cm, choose the DPI, and the pixel size is worked out for you. Crop to the print’s shape so nothing important is cut off at the lab, and save a JPG the kiosk will accept.
One click
Standard print sizes
Each opens the resizer with the size set in inches or cm at 300 DPI and the crop frame locked to the print’s shape.
Each link opens the resizer with these settings already filled in — you only choose the photo and press Download. Nothing is uploaded; the work happens in your browser.
Step by step
How to resize a picture for printing
-
01
Open the photo
Use the original, full-size file — not a copy that was sent through WhatsApp or e-mail, which is usually shrunk.
-
02
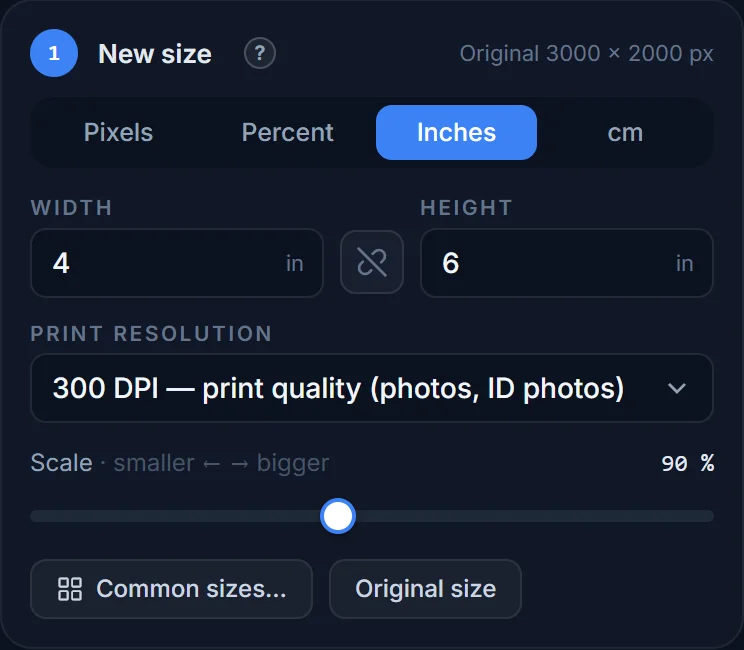
Choose Inches or cm and a DPI
Under New size click Inches or cm; the DPI selector appears. 300 DPI is the standard for photo prints and ID photos; 150 DPI is fine for posters seen from further away.
-
03
Type the print size
Turn the lock off and type both sides — 4 and 6 — or pick a size from Common sizes → Print & ID photos. The frame locks to that shape; drag it to choose what stays in the print. The pixel size (1200 × 1800) is shown underneath.
-
04
Save as JPG at high quality
Choose JPG and set the quality to 90 or more — print labs accept JPG everywhere, and at this size the file is still only a few MB.
Reference
Print sizes in pixels
Pixels = inches × DPI (or cm ÷ 2.54 × DPI). 300 DPI is what photo labs expect; 200 DPI still looks good; below 150 DPI you can see the pixels up close.
| Print size | Pixels at 300 DPI | Pixels at 200 DPI · 150 DPI |
|---|---|---|
| Wallet · 2.5 × 3.5 in | 750 × 1050 | 500 × 700 · 375 × 525 |
| 4 × 6 in · 10 × 15 cm | 1200 × 1800 | 800 × 1200 · 600 × 900 |
| 5 × 7 in · 13 × 18 cm | 1500 × 2100 | 1000 × 1400 · 750 × 1050 |
| 6 × 8 in · 15 × 20 cm | 1800 × 2400 | 1200 × 1600 · 900 × 1200 |
| 8 × 10 in · 20 × 25 cm | 2400 × 3000 | 1600 × 2000 · 1200 × 1500 |
| 8 × 12 in · 20 × 30 cm | 2400 × 3600 | 1600 × 2400 · 1200 × 1800 |
| 11 × 14 in · 28 × 36 cm | 3300 × 4200 | 2200 × 2800 · 1650 × 2100 |
| 12 × 18 in · 30 × 45 cm | 3600 × 5400 | 2400 × 3600 · 1800 × 2700 |
| 16 × 20 in · 40 × 50 cm | 4800 × 6000 | 3200 × 4000 · 2400 × 3000 |
| A6 · 10.5 × 14.8 cm | 1240 × 1748 | 827 × 1165 · 620 × 874 |
| A5 · 14.8 × 21 cm | 1748 × 2480 | 1165 × 1654 · 874 × 1240 |
| A4 · 21 × 29.7 cm | 2480 × 3508 | 1654 × 2339 · 1240 × 1754 |
| A3 · 29.7 × 42 cm | 3508 × 4961 | 2339 × 3307 · 1754 × 2480 |
| US Letter · 8.5 × 11 in | 2550 × 3300 | 1700 × 2200 · 1275 × 1650 |
A 12-megapixel phone photo (4000 × 3000 px) prints beautifully up to 8 × 10 in at 300 DPI and up to 16 × 20 in at 150 DPI. Enlarging beyond the pixels you have does not add detail — the tool warns you when you go past 100 %.
DPI explained
What DPI really means for a photo
DPI (dots per inch — for a digital photo the same thing as PPI, pixels per inch) is simply how many of the photo’s pixels are laid across each inch of paper. The same 1200 × 1800 px file prints at 4 × 6 in if you ask for 300 DPI, or at 8 × 12 in at 150 DPI. The pixels do not change; the paper size does.
So the question is always: how many pixels do I have, and how big do I want the print? Divide the pixels by the inches and you have the DPI. 300 looks perfect in the hand, 200 is very good, 150 is fine for anything viewed from a metre away, and posters and banners are often printed at 100 or less because nobody looks at them up close.
Changing the DPI value in a file’s metadata does nothing to the picture — some tools let you “set 300 DPI” without adding a single pixel. Here, choosing a DPI recalculates the pixel size from the inches you typed, which is what actually matters.
Shape
Why prints crop your photos — and how to take control
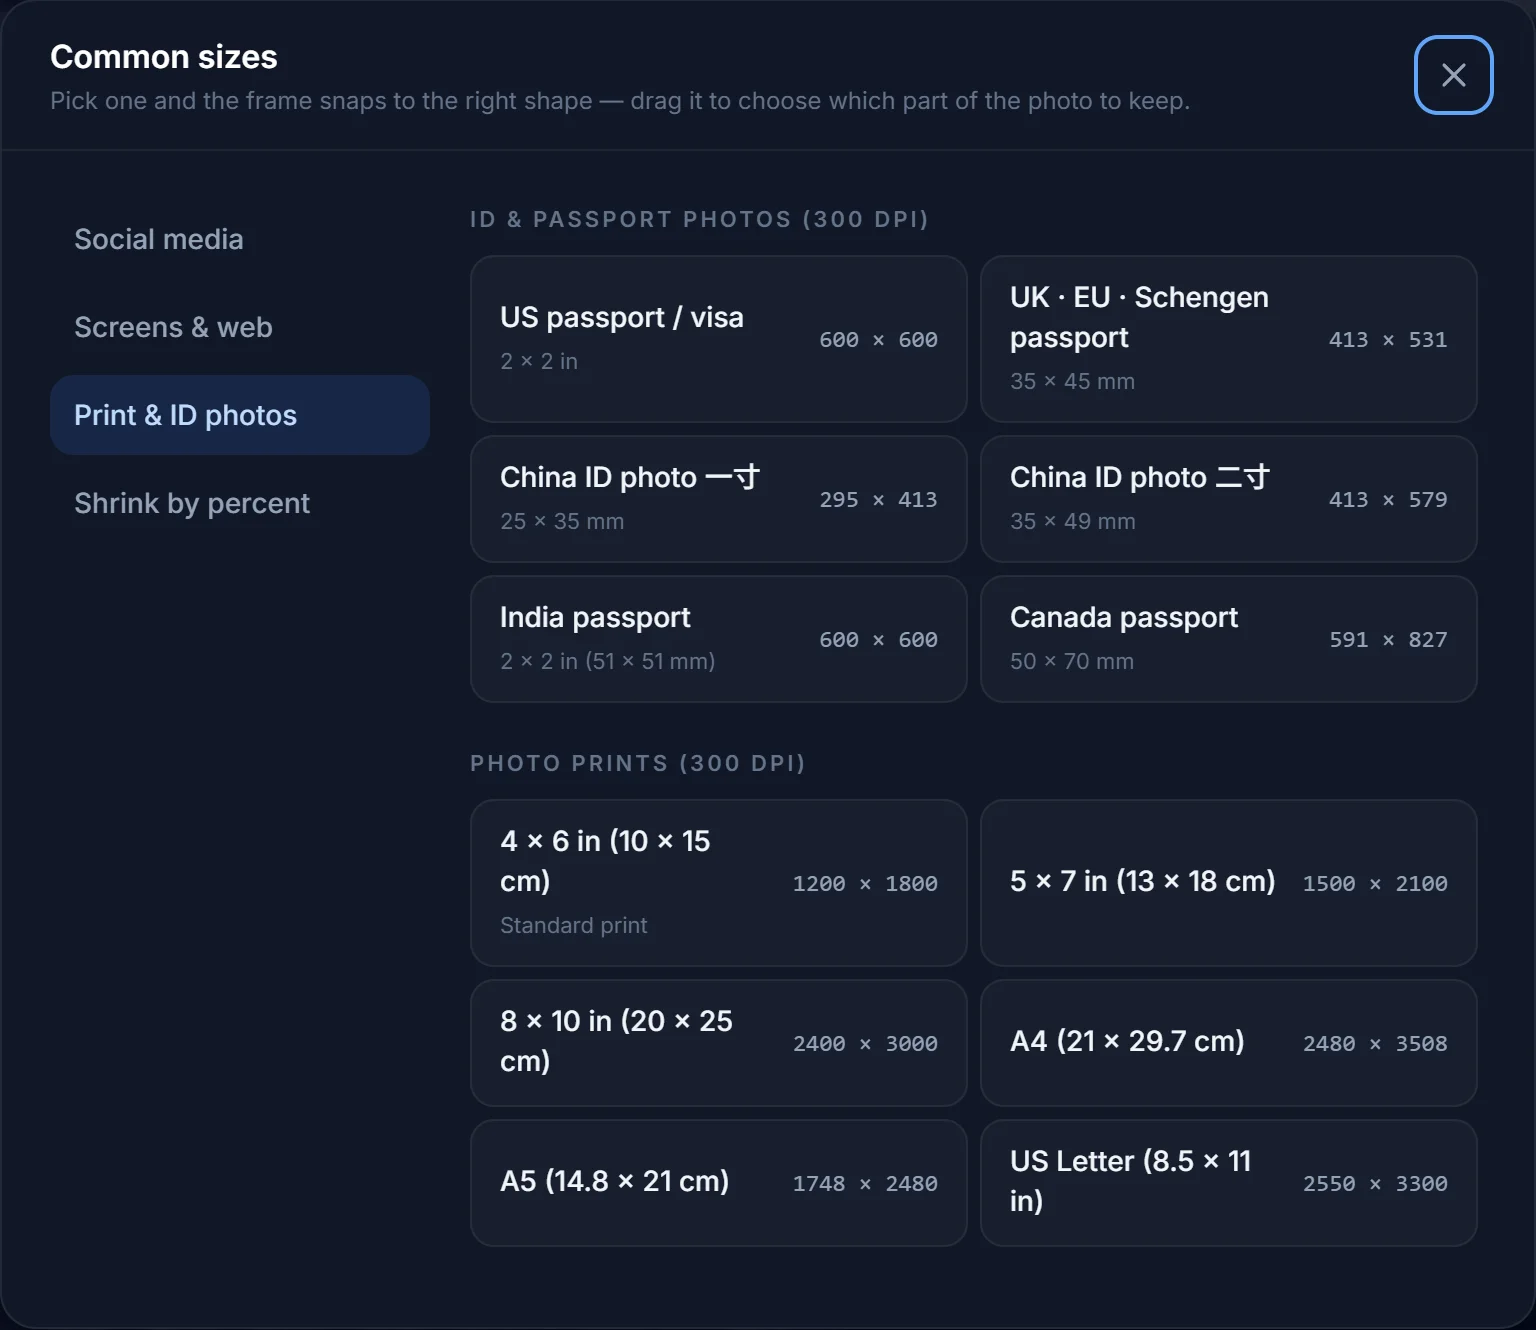
Camera and phone photos are 4 : 3 or 3 : 2; a 4 × 6 print is 3 : 2, a 5 × 7 is 5 : 7, an 8 × 10 is 4 : 5. When the shapes differ, the lab crops — usually from the centre, sometimes cutting off heads. Setting the print size here locks the crop frame to the print’s exact shape so you choose what to keep, and the file you upload to the lab needs no further cropping.
For ID and passport photos (2 × 2 in, 35 × 45 mm) use the passport photo guide — same idea, stricter rules.
How many pixels is a 4 × 6 photo?
1200 × 1800 pixels at 300 DPI, 800 × 1200 at 200 DPI. Any 3 : 2 photo with at least that many pixels prints well as a 4 × 6.
How many pixels is A4 at 300 DPI?
2480 × 3508 pixels (21 × 29.7 cm). At 150 DPI it is 1240 × 1754.
What DPI should I use for printing photos?
300 DPI for prints you hold in your hand (4 × 6 to 8 × 10, ID photos); 200 DPI is still excellent; 150 DPI for posters and anything on a wall; 100 DPI or less for large banners.
Can I print a phone photo at 8 × 10?
Yes. A 12-megapixel photo is 4000 × 3000 px, which is 8 × 10 in at 300 DPI (after cropping to 4 : 5). Even older 8-megapixel photos (3264 × 2448) print well at 8 × 10.
How do I make a picture 300 DPI?
Choose Inches or cm, select 300 DPI, and type the print size. The tool resamples the photo to the exact number of pixels that size needs at 300 DPI. Just changing a DPI number in the file without changing pixels does nothing.
Which format should I send to a print lab?
JPG at quality 90–95. Labs accept it everywhere and the quality loss is invisible in print. Use PNG only for graphics with sharp edges and text.
Resize a photo for printing
Inches or cm, any DPI, cropped to the print’s shape. Free and in your browser.